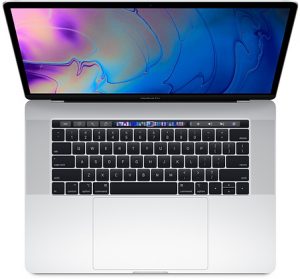
Apple MacBook Pro
Target Disk Mode is a special boot mode for Intel-based Macs (and an option in macOS Recovery on Macs with Apple silicon) that allows you to connect one Mac to another and use the first Mac as an external storage device.
This lets you quickly transfer large amounts of data between the two computers, which is particularly useful for migrating data to a new Mac, recovering data from an old Mac, or troubleshooting a Mac that won’t start up normally.
An important note: If your Mac shows signs of media failure, do not attempt to read data in Target Disk mode or Share Disk mode. Signs of media failure include (but aren’t limited to) clicking sounds, file corruption, and extremely slow operation. Learn more about the signs of media failure.
Below, we’ll explain how to enter Target Disk mode. We’ll also explain how to use a similar feature (“Share Disk” or “Mac Disk Sharing”) for Apple Silicone Macs (M1 and later).
Using Target Disk Mode on Intel-Based Macs
- Connect the Macs: Use a Thunderbolt or USB-C cable to connect the Intel Mac (the one you want to use as a disk) to the second Mac. Note that you must use a Thunderbolt cable if either computer has macOS or later installed.
- Start Target Disk Mode (if the Mac is off): Press and hold the T key, then press the power button to turn on the Mac. Keep holding T until you see the Thunderbolt icon.
- Start Target Disk Mode (if the Mac is already on): Click the Apple icon > System Settings > General > Startup Disk > Restart in Target Disk Mode.
- Access the Disk: The Intel Mac’s drive will appear as an external hard drive on the second Mac’s desktop. You can now copy files to or from it.
- Exit Target Disk Mode: Eject the disk from the second Mac. Then, press and hold the power button on the Intel Mac to turn it off.
Using Share Disk Mode on Apple Silicon Macs
Due to new security features, Apple Silicon Macs (those with M1, M2, and later chips) don’t have a Target Disk Mode in the same way Intel-based Macs do. Instead, they use a feature called Share Disk within macOS Recovery. Here’s how to use it:
- Connect the Macs: Use a USB, USB-C, or Thunderbolt cable to connect the target Apple silicon Mac to the second Mac (the one you’ll be accessing the disk from).
- Turn off the Target Mac: Make sure it’s fully shut down; the Touch Bar and keyboard should be completely off.
- Start up in macOS Recovery: Turn on the target Mac and keep holding the power button until you see the startup options window.
- Continue to Recovery: Select Options, click Continue, and enter your password if asked.
- Open Share Disk: In the macOS Utilities window, select Utilities > Share Disk from the menu bar.
- Choose the disk or volume: Select the one you want to share from this Mac, then click Start Sharing.
- Connect: The second Mac can now connect to the shared disk. Access the shared disk through the Network section in Finder.
- Stop Sharing: When finished, click Stop Sharing in the Share Disk window.
Understanding the Limitations of Target Disk / Share Disk Mode
While Target Disk/Share Disk can be useful, it can’t fix physical issues with your storage media. If the drive you’re trying to access has errors or is failing, Target Disk Mode/Share Disk might not work reliably, and it could cause permanent data loss.
Additionally, Target Disk and Share Disk may not provide the fastest possible transfer speeds; directly connecting the target drive may be advisable, particularly if the Macs are more than a few generations apart.
If you’re experiencing data loss on a macOS device, we’re here to help. Datarecovery.com provides free media evaluations, and we support our services with a no data, no charge guarantee: If we’re unable to successfully recover important files from your macOS device, you don’t pay for the attempt.
To learn more, call 1-800-237-4200 to speak with an expert or submit a case online.


