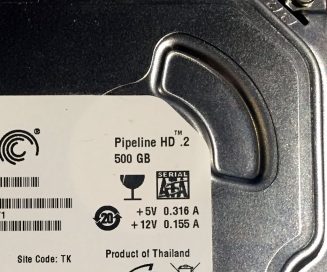
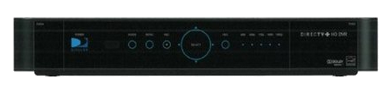
We recently came across something we hadn’t seen before with a couple hard drives, both from DirecTV DVR/receiver systems. When put into a normal computer, they would not spin up or power on. However, the drives’ owner told us that they still worked fine in their original DirecTV DVR. There was some aspect of the drives that required the host to be the DVR for them to work. The owner just wanted to reclaim or re-purpose them for another use since he no longer used the DVRs (he had since upgraded to a fancy new DirecTV box). Curious, we had an engineer investigate ways to unlock DVR hard drives.
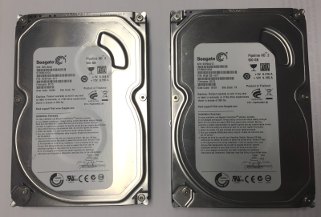 Our engineer found the drives had the Power-up in Standby (PUIS), or power management 4 mode (PM4), enabled in the hard disk configuration. As a result, the disk does not automatically spin up when power is applied. It would only spin up later, when issued an ATA command. This made sense, as how else would the drive know if it were in a DirecTV DVR system? Communication requires the drive be powered on.
Equipment manufacturers use this feature as a power management method to save a little energy and to avoid power spikes when multiple components are powered on at once. You can read more about it here in the working draft of the ATA standard (see section 4.16 on page 38).
This document describes interactions with a device that implements Power-up in Standby and the related commands. Most importantly for us, it details how the PUIS feature can be disabled using the SET FEATURES command.
 The relevant ATA Commands for PUIS feature set include:
- Feature: 0x06 (Enable PUIS)
- Feature: 0x86 (Disable PUIS)
- Feature: 0x07 (Spin up drive after power on)
- Command: 0xEF (Set feature)
The key to allowing regular usage of these hard drives is to disable Power-up in Standby. The tricky part is gaining access to issue commands on the drive. There are two ways to do this. One includes using the original DirecTV or Dish Network box to allow for the drive to power on and spin up. The other method does not require the DVR box. That’s the method we’ll focus on here, since our engineer did not have access to the original DVR hardware. Plus, y’know, it’s more MacGuyver-y that way.
To keep things as simple as possible, and to allow for others to make the same changes, our engineer developed a workaround method using open source software. The steps below outline the process to disable the Power-up in Standby behavior of a hard drive, thereby enabling its use in a general purpose computer.
Unlock DVR Hard Drives Without Using the Original DVR
Please note that, to complete this process, the hard drive needs to remain powered on at all times, as the actual device configuration change occurs in the last step in the sequence.
You’ve probably already guessed this, but you should also note that completing this process will make it so that the drive in question will no longer work in your DirecTV or Dish Network DVR, or whichever device it was originally in.
You will need to create these two bootable CDs:
Steps to Disable PUIS on your DirecTV DVR Hard Drive:
- Insert the GParted CD in the computer you’ll use and power off the computer.
- Connect the DVR hard drive to your computer with power and SATA data cables (you may use a SATA to USB adapter).
- Start the computer and boot to the GParted CD (you may need to change the boot device order in BIOS, or you could just make sure your OS drive is unplugged).
- In GParted, select the first option. Select the second option to avoid loading keyboard options. Enter your language info. Use the first option for graphics info. Then hit “Enter” through three screens.
- You should be at a screen showing hard drive info. Double-click the red “X” at top left. Select reboot. The computer will eject the GParted CD when it begins to shut down. Immediately replace the CD with the HDAT2 CD.
- Boot to the HDAT2 CD.
- Select the first option.
- In the command prompt, type
HDAT2. - After HDAT2 starts, select the drive you are working on and hit “Enter”.
- Select “Device Configuration Overlay (DCO) menu”. Then, at the bottom, select “Restore”. Hit “Y” to continue and it will provide some output.
- Hit “Escape” to return to the original menu where you see “Commands Menu,” and select that. Choose “commands/feature sets.” Find the “Power-Up In Standby (PUIS)” item and highlight it. Hit the right arrow key, then the “S” key. Type “Y” at the prompt. Assure the process completes without any errors, and the PUIS item should change to disabled.
Those steps have unlocked the drive (if everything went according to plan). Next you can partition and format it, and use it as a regular hard drive. The drive will spin up just fine the next time it is powered on.
Alternate Method: Using the Original DVR to Unlock The Drive
If you do have your original DVR device, you can use that instead. First, power up the drive using the DVR device as normal, allowing the DVR to send the spin up ATA command. Now, it’s ready to have the configuration changed. After that, swap the SATA data cable from the DVR to your computer (while it is running, called “hot swap”), where you can toggle the PUIS setting of the drive.